Creating a Case
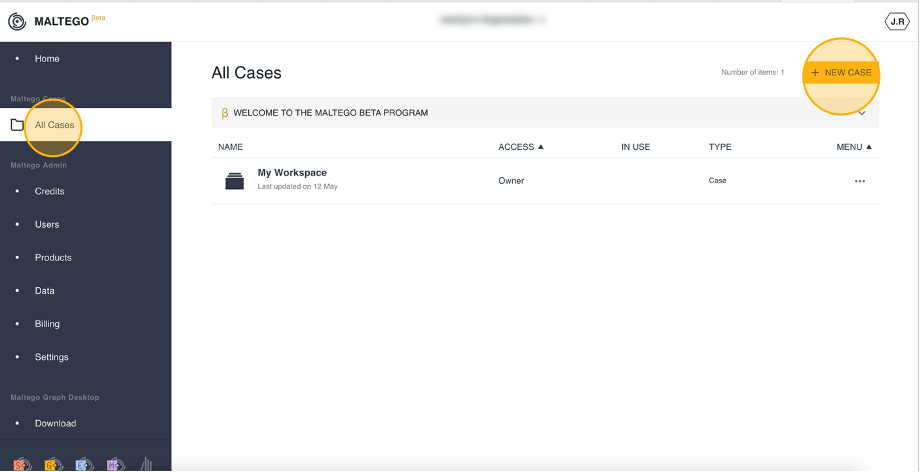
To create a case, log in to the Maltego app and navigate to All Cases from the side menu. Here, you will see all the cases you have created, as well as those shared with you. To create a new case, click the New Case button in the top-right corner.
Enter a case name and choose whether to enable encryption for the case and its files.
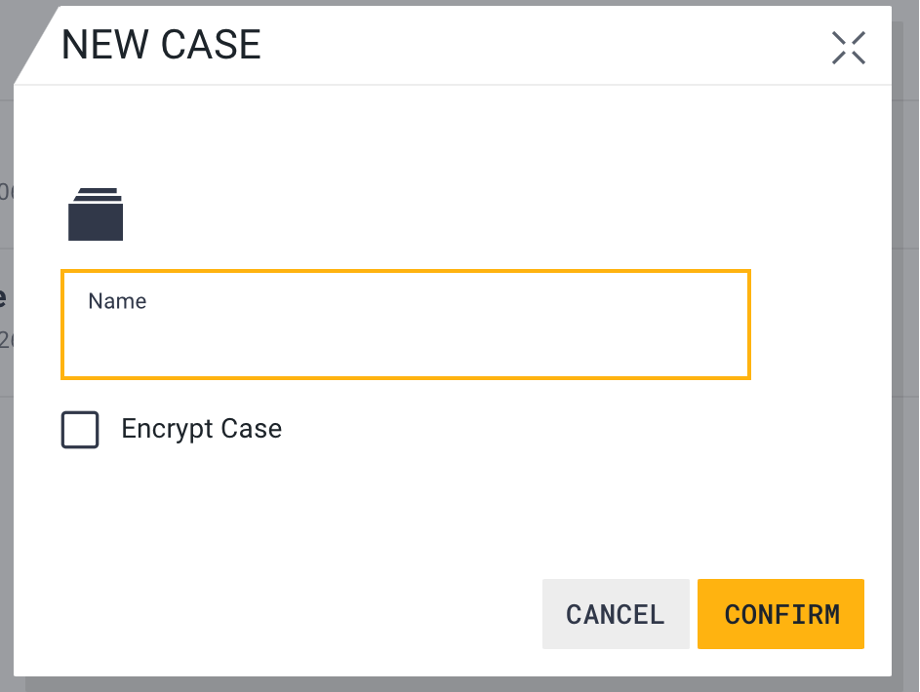
If encryption is selected, you will be prompted to set up a master password, which is required for end-to-end (E2E) encryption.
Click Confirm, and the case will be created and appear in your case list.
Renaming a Case
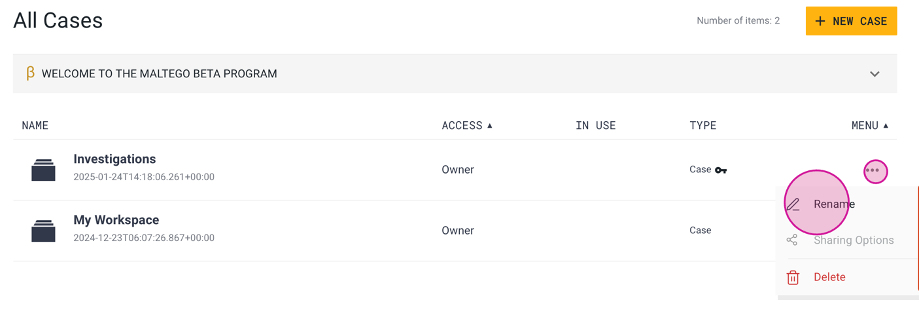
Option A:
- Click the More Options icon on the far right of the case.
- Select Rename.
- Enter the new case name.
- Click Confirm.
The case will be successfully renamed.
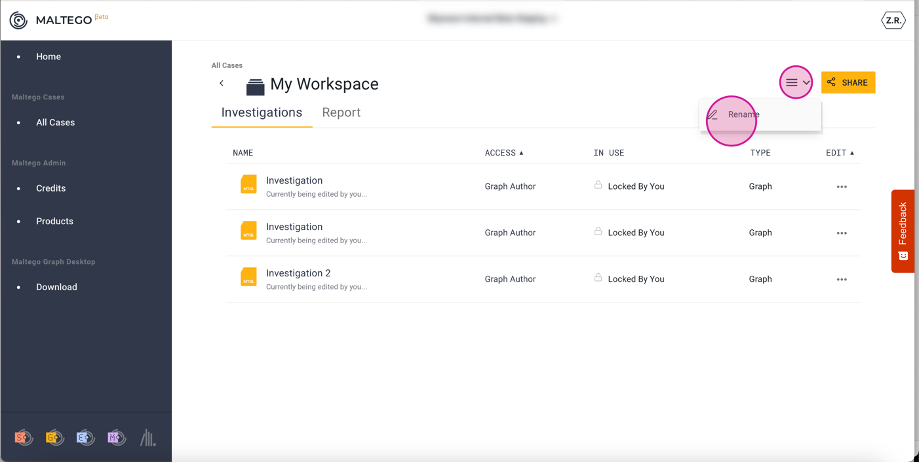
Option B:
- Click on the case to access its contents.
- Click on the hamburger icon located in the top-right corner, and then select Rename.
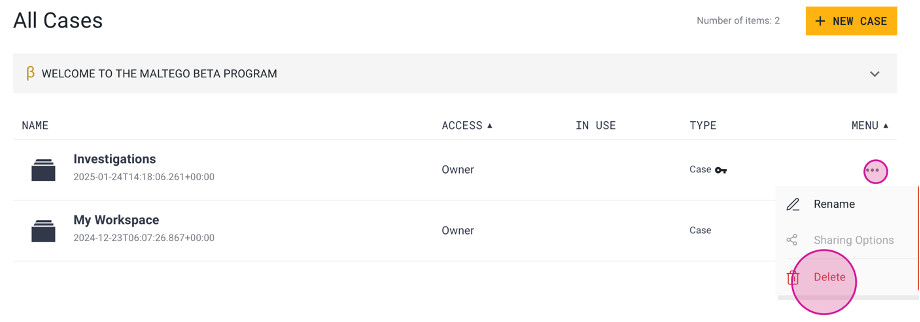
Deleting a Case
- Click the More Options icon on the far right of the case.
- Select Delete.
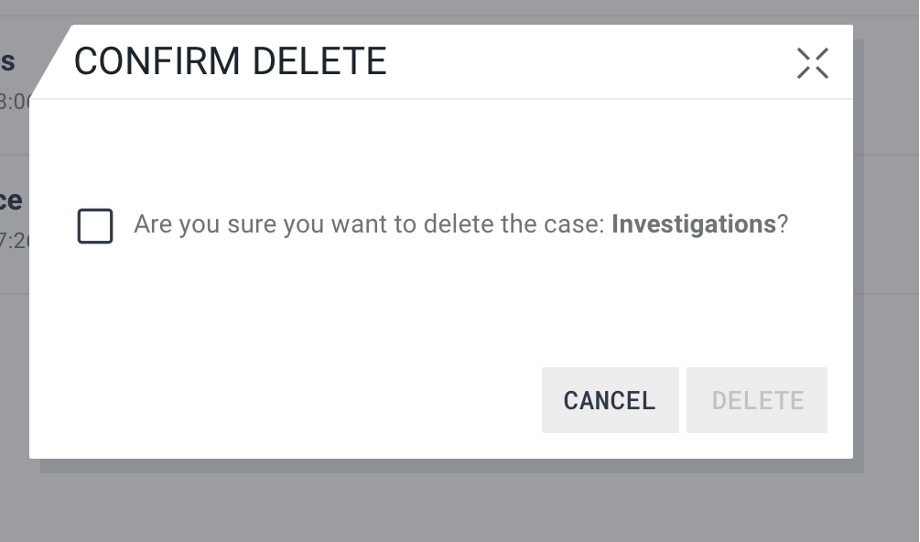
- A confirmation prompt will appear.
- Select the checkbox to confirm the action.
- Click the Delete button.
Note: You must have the Owner permission role to delete a case.